Ok, so I am also going to share my Pasta recipe!! I love making fresh pasta. There is really nothing like it. It takes some effort, but it really is worth it. I know that during this crazy virus stuff the grocery store aisles are empty of dried pasta but they have had eggs, so if you have all purpose flour this is a can-do.
Recipe:
3 1/2 Cups all purpose flour, I use Bob's Red Mill Unbleached All Purpose Flour
4 eggs
1 teaspoon Salt
1 Tablespoon or so of filtered water
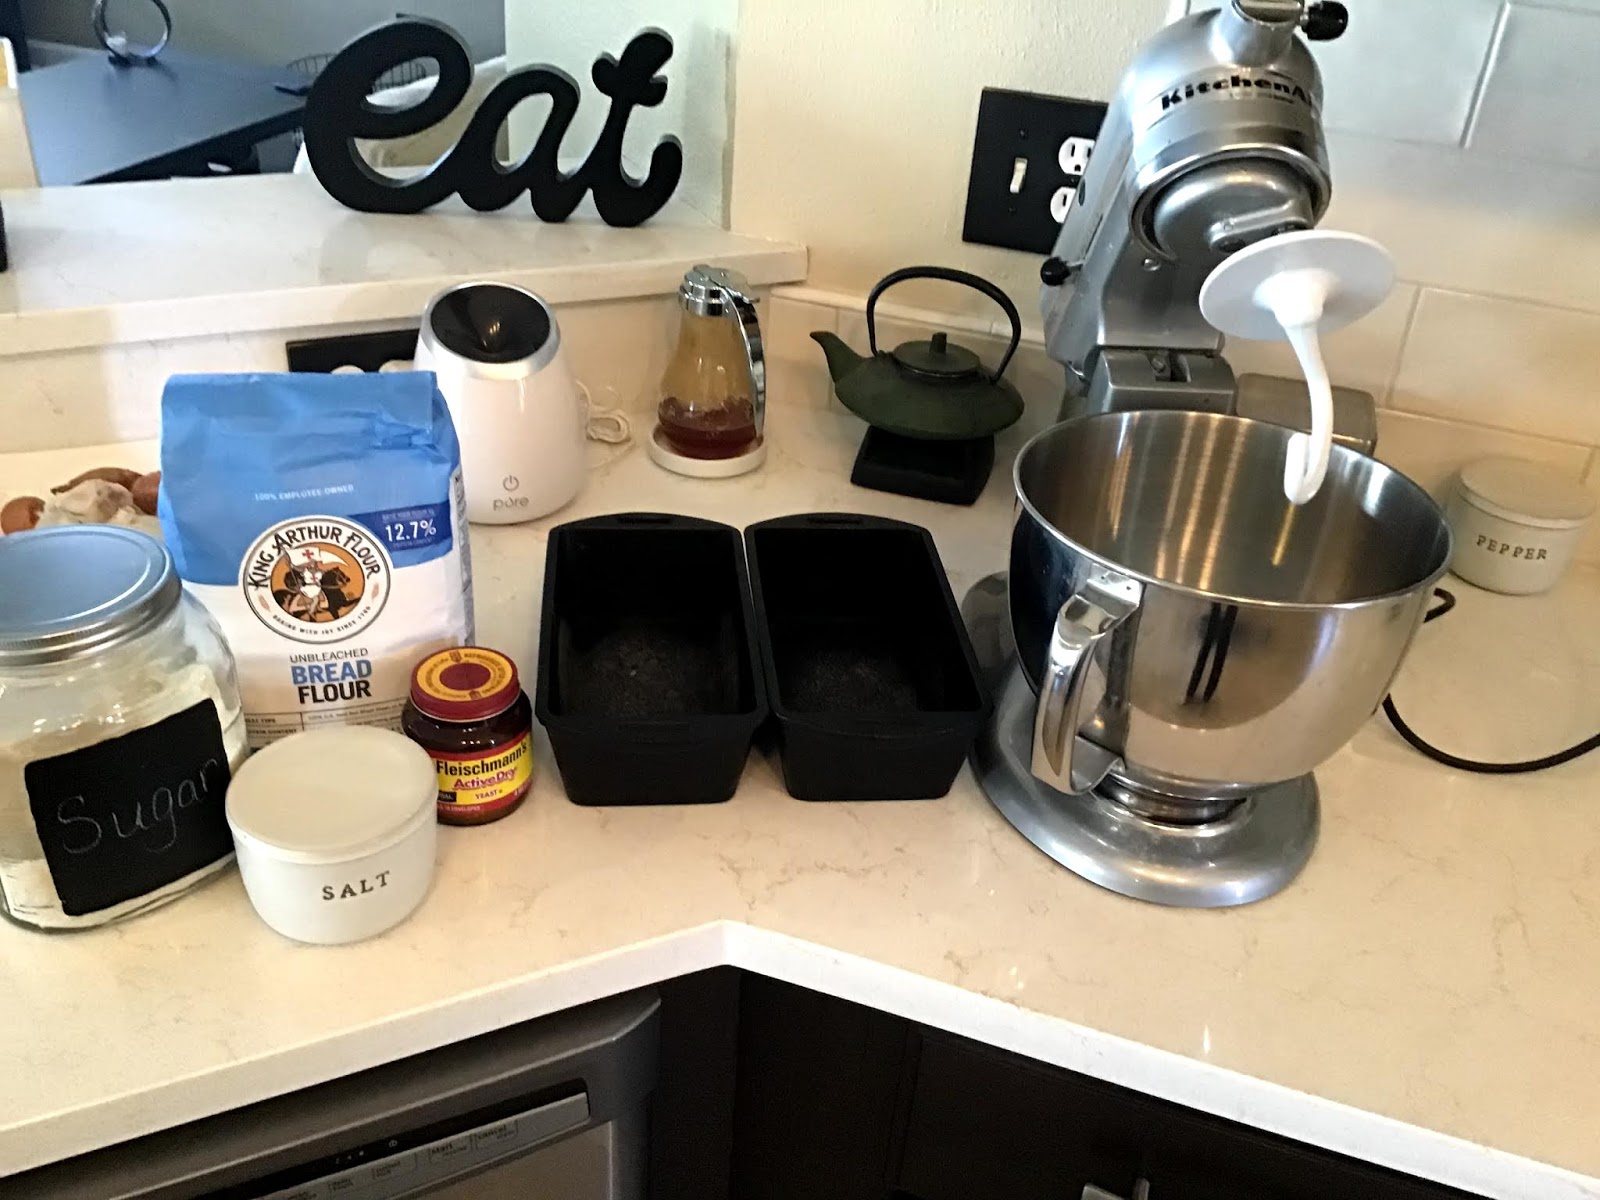
Right up front I will tell you I use my KitchenAid mixer with a pasta attachment. But you can use the manual pasta roller, which is super cheap to get. You can also use the pool method to mix the ingredients where you put the flour on a surface like your countertop and make a pool in the middle, put the eggs and salt in and slowly fold the sides in with a fork making the dough. I like using my mixer. I also use a sifter for my flour. I like that it makes the pasta really light. But it can be done without sifting.
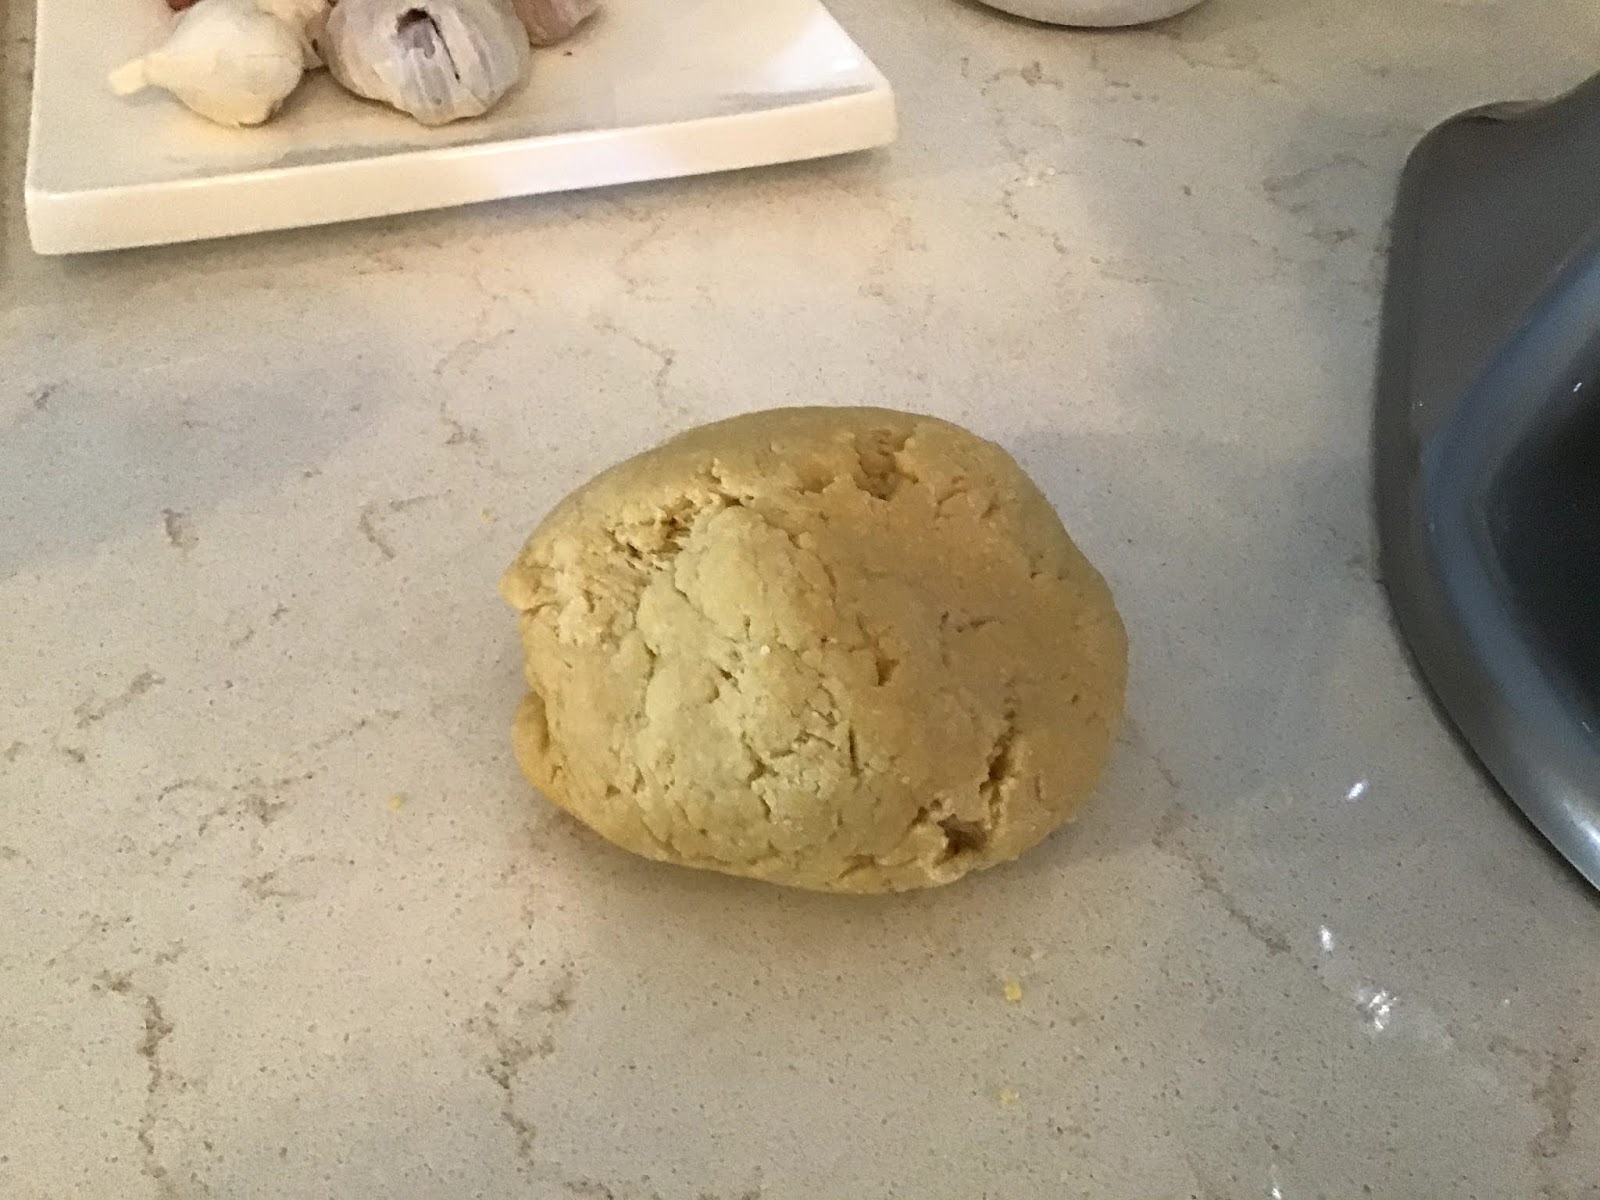
Add the flour to the bowl and the salt. With the dough hook on mix those together. I crack all four eggs into a measuring cup and add 1 Tablespoon filtered water. Add the eggs one egg at a time and let it mix on low to incorporate each egg before adding another. Once all eggs have been added let it run for a few minutes, stop it and check the moisture level. If it needs more water add a teaspoon and run it again and see how it is. DO NOT add too much water. It only takes a little, and too much makes your pasta dough wet and sticky. If that does happen you have to add a little flour and try to get it to the right consistency. you want it doughy not crumbly or sticky.
Once you have to dough the right consistency, you're ready to roll it through the pasta machine. I roll my dough long like I do with cookie dough and slice it into smaller easy to handle pieces. I press those down flat enough to fit through the press.
and off we go! I put the flattened pasta pieces through the press first on 1 and folding until it is the shape and width I like then I run in through on 2, 3 and then 4. I like the thickness of 4. If your pasta is a little sticky when you are running it through just dust it with a little flour.
Once all of the pasta sheets are rolled out Its time to change out the attachments to what pasta I am making. If you don't have these don't worry. You can cut pasta with anything and make any type you like. My daughter loves to make pappardelle which she does with a pizza slicer, so it really just depends on what you have.
Once I run the sheets through I always dust the pasta with a little all purpose flour and work it through to make sure they don't stick.
And there it is!! Pasta! Now all that is left is to cook and eat it. It takes just a few minutes in boiling water, way less than what dried pasta takes. Now you can dry it to use later, but we always eat it fresh.
Hope you give it a try! And once you do I think you will be hooked.
A Mom trying to do the healthiest and smartest things for my child. Hoping to help other Mothers looking for the same.
Sunday, March 29, 2020
Sharing My Bread Recipe
I have had several friends as this Stay at Home During the Virus thing is happening ask me how to make bread. I have made my own bread for years, but now that stores are running out of it and people are trying to figure out what to do I am glad to share my bread recipe.
The recipe:
1 1/4 cups water, filtered
3 1/3 Cups Bread Flour. Now I make my own flour with wheat berries and a grinder, however since most people don’t have these I recommend Bob’s Red Mill unbleached Bread Flour.
2 tablespoons Organic Sugar
1 1/2 teaspoons salt
2 1/2 teaspoons Active Dry Yeast, Not rapid rise
I did this is with a KitchenAid mixer since most people asking me for this recipe have one. If you do not have one you can do this with a big mixing bowl, it just takes longer to mix.
The first thing is to put the ingredients in order. The water on the bottom, flour next, and so on, layering them. Once all your ingredients on it then put the dough hook on the mixer and put it on low. Low, or the ingredients will blow up in your face. Let it run for a while. The ingredients with incorporate and it will then become dough.
One you have dough, take it out on a lightly floured surface and work the dough. I take the front and roll it over the top and gently press it forward and keep that same motion for a few minutes. Once the dough is ready put it in a large bowl that has been lightly oiled on the sides with olive oil, to prevent it from totally sticking. Cover it with a clean dish towel and let it rise. I like to put it under the stove light so the heat helps this process. It will take about an hour to rise.
Once it rises, I take it out and on that lightly floured surface again I work the dough a second time. This time I form it into a ball and split it in two. I like to make two loaves, but you can keep this together to form one large loaf, it just wont fit in a bread pan unless you split it. ( So if you decide to make one just shape it like a French loaf and you can bake it that way on a parchment lined baking sheet. ) One you have split the loaves put them into the bread pans and cover them with a towel again for the second rise. Once the have risen again it's time to bake.
Bake them in the oven at 400* for 20 mins.
Once the cool off, cut and enjoy!!!
Hopefully this will help until this is all over and people aren't fighting to find bread. Or maybe you will enjoy making it smooch you won't ever buy store-bought again!!!
The recipe:
1 1/4 cups water, filtered
3 1/3 Cups Bread Flour. Now I make my own flour with wheat berries and a grinder, however since most people don’t have these I recommend Bob’s Red Mill unbleached Bread Flour.
2 tablespoons Organic Sugar
1 1/2 teaspoons salt
2 1/2 teaspoons Active Dry Yeast, Not rapid rise
I did this is with a KitchenAid mixer since most people asking me for this recipe have one. If you do not have one you can do this with a big mixing bowl, it just takes longer to mix.
The first thing is to put the ingredients in order. The water on the bottom, flour next, and so on, layering them. Once all your ingredients on it then put the dough hook on the mixer and put it on low. Low, or the ingredients will blow up in your face. Let it run for a while. The ingredients with incorporate and it will then become dough.
One you have dough, take it out on a lightly floured surface and work the dough. I take the front and roll it over the top and gently press it forward and keep that same motion for a few minutes. Once the dough is ready put it in a large bowl that has been lightly oiled on the sides with olive oil, to prevent it from totally sticking. Cover it with a clean dish towel and let it rise. I like to put it under the stove light so the heat helps this process. It will take about an hour to rise.
Once it rises, I take it out and on that lightly floured surface again I work the dough a second time. This time I form it into a ball and split it in two. I like to make two loaves, but you can keep this together to form one large loaf, it just wont fit in a bread pan unless you split it. ( So if you decide to make one just shape it like a French loaf and you can bake it that way on a parchment lined baking sheet. ) One you have split the loaves put them into the bread pans and cover them with a towel again for the second rise. Once the have risen again it's time to bake.
Bake them in the oven at 400* for 20 mins.
Once the cool off, cut and enjoy!!!
Hopefully this will help until this is all over and people aren't fighting to find bread. Or maybe you will enjoy making it smooch you won't ever buy store-bought again!!!
Sunday, January 26, 2020
My Love of Oregano Oil just grew
In light of all the scary things out about this new Virus, I wanted to share something that made me happy to see. We use Oregano Oil for all things that ail us, and will certainly continue with this. Make sure you get a brand that uses purity practices.
Tuesday, December 20, 2016
Homemade Christmas!
Recently I discovered the wonder of making soap! I have wanted to make bar soap for awhile but was always afraid of using the lye. I had the chance to see someone make it and seeing it made me realize that while, yes it can be caustic if used incorrectly, it really is a simple part of soap making.
I also really have gotten into making my own candles. I wanted to make them with materials I didn't have to worry about burning in my home and being toxic. I knew if I made them myself I could make them safer
So with it being Christmas and my new favs to make, I decided to do a homemade Christmas! After all who doesn't love wonderful soaps and candles? Oh and a little scented bath salt to go with!
In this blog I'll start with the making of candles. I swear if I knew how easy this was I would have been doing this a long time ago and not spending so much money on the soy safer ones.
For my supplies I bought soy flakes from bulkapothecary.com, low smoke organic wicks from amazon, and lavender essential oil from Whole Foods. I also purchased a pouring pot from Amazon. I already had a candle thermometer, if you don't you will need one.
For the Christmas candles I decided to make them in jam Ball jars. Which makes this whole process incredibly easy. Ready?
1lb of flakes will fill 3 jars with candles. Put the flakes into the pouring pot along with the candy thermometer. Put the pouring pot into another bigger pot and fill that pot, not the pouring pot, with water until it is halfway up the side of the pouring pot. Put the heat on high simmer. (basically you are doing a double boiler) When the wax is melting I like to take a wooden chopstick and stir it to make sure it all gets mixed in. Then once it reaches 180 it's done melting. Take out the pouring pot and let it cool until it reaches 100 before putting in essential scented oils. I use 1 oz per lb of wax. If you put the oils in before it has cooled off you can loose the scent. Oils have what is called a flashpoint, which basically means it will burn out the scent if you add it when it's too hot. If you aren't using oils just pour it without.
before pouring the wax into the jars I take the ends of my wicks and dip them into the hot wax then put them onto the bottom of my jar and press with the chopstick to make them stick. This will keep them in place. Once they are set pour in your wax. After I pour the wax I take a wooden clothespin and clip it to thick at the top of the jar. This will hold in in the center while your wax dries.
Now let it sit until its cool and the wax is set. That is all there is to it!
I added some sparkly wreaths to the lid and tada! Homemade lavender candles
How easy is that?
Give it a shot! You will be shocked at how easy it is to do.
Next up........Making soap!
I also really have gotten into making my own candles. I wanted to make them with materials I didn't have to worry about burning in my home and being toxic. I knew if I made them myself I could make them safer
So with it being Christmas and my new favs to make, I decided to do a homemade Christmas! After all who doesn't love wonderful soaps and candles? Oh and a little scented bath salt to go with!
In this blog I'll start with the making of candles. I swear if I knew how easy this was I would have been doing this a long time ago and not spending so much money on the soy safer ones.
For my supplies I bought soy flakes from bulkapothecary.com, low smoke organic wicks from amazon, and lavender essential oil from Whole Foods. I also purchased a pouring pot from Amazon. I already had a candle thermometer, if you don't you will need one.
For the Christmas candles I decided to make them in jam Ball jars. Which makes this whole process incredibly easy. Ready?
1lb of flakes will fill 3 jars with candles. Put the flakes into the pouring pot along with the candy thermometer. Put the pouring pot into another bigger pot and fill that pot, not the pouring pot, with water until it is halfway up the side of the pouring pot. Put the heat on high simmer. (basically you are doing a double boiler) When the wax is melting I like to take a wooden chopstick and stir it to make sure it all gets mixed in. Then once it reaches 180 it's done melting. Take out the pouring pot and let it cool until it reaches 100 before putting in essential scented oils. I use 1 oz per lb of wax. If you put the oils in before it has cooled off you can loose the scent. Oils have what is called a flashpoint, which basically means it will burn out the scent if you add it when it's too hot. If you aren't using oils just pour it without.
before pouring the wax into the jars I take the ends of my wicks and dip them into the hot wax then put them onto the bottom of my jar and press with the chopstick to make them stick. This will keep them in place. Once they are set pour in your wax. After I pour the wax I take a wooden clothespin and clip it to thick at the top of the jar. This will hold in in the center while your wax dries.
Now let it sit until its cool and the wax is set. That is all there is to it!
I added some sparkly wreaths to the lid and tada! Homemade lavender candles
How easy is that?
Give it a shot! You will be shocked at how easy it is to do.
Next up........Making soap!
Tuesday, October 11, 2016
Fav New Product! Beeswax Food Wrap
I have found a new product that I am completely in LOVE with! So of course I have to share.
Using plastic wrap in my house is just not an option. It is totally bad for the environment since it really isn't recylclable and will sit in a landfill forever, on top of which I am not ok with that plastic sitting on top of my food. I have and use glass storage containers for almost everything, but there are times when they just don't fit. It drove me crazy that I didn't have anything to fit what my food was on that would work and was safe. Well, that just changed!
I found Abeego reusable beeswax food wrap. They are amazing! They wrap around and adhere to anything! They are natural, breathable, and when they are used up.....compostable!
They are made of beeswax, tree resin, and jojoba oil infused with hemp and organic cotton cloth. All ingredients that are safe.
They come with 3 sheets, a small, med, and large.
Now here is the cool part. Take them out and decide which size works best for your storage needs, place it over your container and hold your hands on it and as your hands warm up the material it adheres to the shape and stays! Once your done using it gently remove it and wash with gentle dish soap and dry.
Here is another fantastic part, its breathable. The other night I made a big salad and ended up with leftovers. I have in the past put it into a glass container with a lid. Well, because of the airtight lid the salad would get limp. I used the Abeego beeswax wrap over the salad bowl and because it is breathable the salad was still super fresh two days later! Amazing
Give this one a shot! You will love them
Available at Reuseit.com
Till Next Blog...........
Using plastic wrap in my house is just not an option. It is totally bad for the environment since it really isn't recylclable and will sit in a landfill forever, on top of which I am not ok with that plastic sitting on top of my food. I have and use glass storage containers for almost everything, but there are times when they just don't fit. It drove me crazy that I didn't have anything to fit what my food was on that would work and was safe. Well, that just changed!
I found Abeego reusable beeswax food wrap. They are amazing! They wrap around and adhere to anything! They are natural, breathable, and when they are used up.....compostable!
They are made of beeswax, tree resin, and jojoba oil infused with hemp and organic cotton cloth. All ingredients that are safe.
They come with 3 sheets, a small, med, and large.
Now here is the cool part. Take them out and decide which size works best for your storage needs, place it over your container and hold your hands on it and as your hands warm up the material it adheres to the shape and stays! Once your done using it gently remove it and wash with gentle dish soap and dry.
Here is another fantastic part, its breathable. The other night I made a big salad and ended up with leftovers. I have in the past put it into a glass container with a lid. Well, because of the airtight lid the salad would get limp. I used the Abeego beeswax wrap over the salad bowl and because it is breathable the salad was still super fresh two days later! Amazing
Give this one a shot! You will love them
Available at Reuseit.com
Till Next Blog...........
Saturday, August 6, 2016
Used Coffee Grounds Cellulite Scrub!
My husband drinks a lot of coffee! Which is awesome for all the used coffee grounds. I use them for everything!
Ants coming in the house, coffee grounds where they are coming from and they leave. Fertilize the plants, bushes and lawn naturally with a mix of used coffee grounds and Epsom salt. Blueberry bushes love them and I get the biggest, sweetest fruit. My worms in the worm bin, love them and they make the prettiest soil after devouring it. LOVE used coffee grounds!!
If you look at any of the store cellulite scrubs, yep ladies it just happens, they almost all contain caffeine. It helps to demise the bumps on the upper thigh that we love oh so much! However, they also contain ingredients that I'm not sure what they are and for me that means it could be toxic. I don't like the idea of a hot shower opening up your pores and adding chemicals. Seems to me like that is just asking for trouble.
Sooooo, as I was about to go outside with them when it hit me. Make a scrub for cellulite.
I took the grounds from the day before, about a cup, and about a tablespoon of course pink Himalayan salt for a little extra oomph, a few melted tablespoons of organic coconut oil and mixed. I added a little more coffee to get a consistency I liked. Tada!

Now I am a big fan of dry brushing, have been doing it for years. So I did my dry brushing and then took a small amount of the mixture and scrubbed, then rinsed and showered as usual. It was very invigorating! I've been using it a couple times a week and I love it.
I would caution to only use a small amount as coconut oil in large amounts can plug a drain! But once a week I put some baking soda and vinegar in the drain to keep it clear.
There you have it! Three ingredients, no crazy chemicals!
Give it a shot!
Till Next Blog..............Happy Scrubbing
Ants coming in the house, coffee grounds where they are coming from and they leave. Fertilize the plants, bushes and lawn naturally with a mix of used coffee grounds and Epsom salt. Blueberry bushes love them and I get the biggest, sweetest fruit. My worms in the worm bin, love them and they make the prettiest soil after devouring it. LOVE used coffee grounds!!
If you look at any of the store cellulite scrubs, yep ladies it just happens, they almost all contain caffeine. It helps to demise the bumps on the upper thigh that we love oh so much! However, they also contain ingredients that I'm not sure what they are and for me that means it could be toxic. I don't like the idea of a hot shower opening up your pores and adding chemicals. Seems to me like that is just asking for trouble.
Sooooo, as I was about to go outside with them when it hit me. Make a scrub for cellulite.
I took the grounds from the day before, about a cup, and about a tablespoon of course pink Himalayan salt for a little extra oomph, a few melted tablespoons of organic coconut oil and mixed. I added a little more coffee to get a consistency I liked. Tada!
Now I am a big fan of dry brushing, have been doing it for years. So I did my dry brushing and then took a small amount of the mixture and scrubbed, then rinsed and showered as usual. It was very invigorating! I've been using it a couple times a week and I love it.
I would caution to only use a small amount as coconut oil in large amounts can plug a drain! But once a week I put some baking soda and vinegar in the drain to keep it clear.
There you have it! Three ingredients, no crazy chemicals!
Give it a shot!
Till Next Blog..............Happy Scrubbing
Friday, June 3, 2016
Ridiculously Good Peach Jam!
It is one of my favorite times of year in our backyard, Peaches on our tree! There is something so wonderful about going outside and picking a soft ripe peach and eating it. They taste so different than one that was picked way before its time to be shipped to the store to ripen.
We eat a lot of them straight off the tree, but then you need to use them for other things. I have made pies and ice creams but decided this time to make some jam. I have made jam with blueberries and strawberries but this was my first time using peaches.
I used 9 good sized peaches. Put them in a pot of simmering water for about two minutes, then transferred them to an ice bath to make the skin easy to peel off. Once peeled i pitted them and cut them up. I put two tablespoons of lemon juice on them and let them sit. In the meantime I put 1/2 cup water with 3 cups of sugar on medium in a pot until the sugar was dissolved. I put the peaches in a food processor and pulsed it, but left some small chunks since we like our jam like that. Then mixed the peach mixture into the sugar water mix, cooking it until it thickened. I always put a plate in the freezer while making jam to test its doneness. If you take the plate out and put a little jam on the cold plate and hold it sideways you can tell how thick it is. Then proceeded them in my canning jars.
EASY, AND SO YUMMY!
This could be one of my favorite jams I have made yet.
I will be trying it with agave nectar for my diabetic grandfather next week. Hopefully it turns out as good as the strawberry and blueberry did with it.
Give this one a shot while peaches are ready, you won't be sorry!
Till next blog.......
We eat a lot of them straight off the tree, but then you need to use them for other things. I have made pies and ice creams but decided this time to make some jam. I have made jam with blueberries and strawberries but this was my first time using peaches.
I used 9 good sized peaches. Put them in a pot of simmering water for about two minutes, then transferred them to an ice bath to make the skin easy to peel off. Once peeled i pitted them and cut them up. I put two tablespoons of lemon juice on them and let them sit. In the meantime I put 1/2 cup water with 3 cups of sugar on medium in a pot until the sugar was dissolved. I put the peaches in a food processor and pulsed it, but left some small chunks since we like our jam like that. Then mixed the peach mixture into the sugar water mix, cooking it until it thickened. I always put a plate in the freezer while making jam to test its doneness. If you take the plate out and put a little jam on the cold plate and hold it sideways you can tell how thick it is. Then proceeded them in my canning jars.
EASY, AND SO YUMMY!
This could be one of my favorite jams I have made yet.
I will be trying it with agave nectar for my diabetic grandfather next week. Hopefully it turns out as good as the strawberry and blueberry did with it.
Give this one a shot while peaches are ready, you won't be sorry!
Till next blog.......
Friday, March 11, 2016
Delicious Jam Without Sugar
I love making jam! I have got it down. This is the time of year in FL that we go strawberry picking, organic of course, and I start making our years supply of jam. I love the way the house smells of strawberry for a week while I am getting all the jam made.
I make my jam pretty simply, fruit, lemon juice and sugar. But I have a 96 year old grandfather who cannot have sugar and he wanted me to send him some strawberry jam. Now he is a sneaky guy who would certainly eat my regular jam, but it wouldn't be in his best interest health wise so I had to do some research to see if I could make it work for him.
I am completely against using artificial sweeteners with chemicals in them. I wanted to find something more natural that would work in the jam. I discovered that I could use organic agave nectar. It is a low glycemic sweetener made from the juice of the agave plant.
I will admit I wasn't sure how it would turn out, after all I have making jam down to a science with my sugar and I wasn't sure how this would process. I did have to adjust the amount as 1/2 cup of agave is equal to 1 cup of sugar in sweetness. So I went for it.
I mashed up 4 cups of strawberries (trimmed and hulled), added 1/4 cup lemon juice, and 2 cups of agave (instead of my usual 4 cups sugar). I used golden light as it has a lighter flavor and wouldn't effect the final flavor of the jam. I brought it to a gentle boil and continued boiling until it reached a temperature of 220 on my candy thermometer and took it off the heat to rest.
Now came the test. Knowing that I am too much of a critic of my own cooking sometimes I had my husband taste it without telling him it was the agave. He said it was delicious and when I told him he said he couldn't tell the difference! Yesssssss
So I processed them as usual in a water bath and now they are ready to go to my grandfather!
I am so happy I discovered this! If your have someone on a sugar restrictive diet maybe it would work for you too!
Give it a shot!
Till Next Blog.......
I make my jam pretty simply, fruit, lemon juice and sugar. But I have a 96 year old grandfather who cannot have sugar and he wanted me to send him some strawberry jam. Now he is a sneaky guy who would certainly eat my regular jam, but it wouldn't be in his best interest health wise so I had to do some research to see if I could make it work for him.
I am completely against using artificial sweeteners with chemicals in them. I wanted to find something more natural that would work in the jam. I discovered that I could use organic agave nectar. It is a low glycemic sweetener made from the juice of the agave plant.
I will admit I wasn't sure how it would turn out, after all I have making jam down to a science with my sugar and I wasn't sure how this would process. I did have to adjust the amount as 1/2 cup of agave is equal to 1 cup of sugar in sweetness. So I went for it.
I mashed up 4 cups of strawberries (trimmed and hulled), added 1/4 cup lemon juice, and 2 cups of agave (instead of my usual 4 cups sugar). I used golden light as it has a lighter flavor and wouldn't effect the final flavor of the jam. I brought it to a gentle boil and continued boiling until it reached a temperature of 220 on my candy thermometer and took it off the heat to rest.
Now came the test. Knowing that I am too much of a critic of my own cooking sometimes I had my husband taste it without telling him it was the agave. He said it was delicious and when I told him he said he couldn't tell the difference! Yesssssss
So I processed them as usual in a water bath and now they are ready to go to my grandfather!
I am so happy I discovered this! If your have someone on a sugar restrictive diet maybe it would work for you too!
Give it a shot!
Till Next Blog.......
Sunday, October 4, 2015
My Repurposed Soap!
I purchase Dr. Bronners unscented bar soap for our house and have for years. I love it, but it isn't the cheapest soap out there.
My husband will use a bar of soap until it gets thin and then he is done with it. It leaves behind a decent amount of soap, and it drives me crazy.
I decided to put a jar in our bathroom and have been putting the pieces of the never to be used again soap into it thinking that I will find a way to use them again.
Well, it happened. I was looking it at it and thought that there had to be enough in there that I could melt it down and make bars of soap with it. And, with my husband shaking his head......again, I started the soap repurposing!
I took all of my pieces and put them into a pot and covered them with filtered water and let them sit over night.
In the morning I added a teaspoon of olive oil and began to slowly melt the mixture. It becomes soap soup. I stirred it regularly until it became all melted and bubbly. Then I put the soapy mixture into my mini bread pan tins that were sprayed with cooking spray and let them sit for about a day and a half to cool and set.
When I popped them out I had 3 new, repurposed, bars of soap!! I was thrilled. (And maybe danced around my kitchen)
I will try next time to maybe put some wax paper under them as they still did stick a little to the pan.
This has made me so happy to have been able to make those slivers useful again. And yes the jar returned to the bathroom to my husband shaking his head.
Give it a shot! Super easy and money saving.
Till Next Blog.......
My husband will use a bar of soap until it gets thin and then he is done with it. It leaves behind a decent amount of soap, and it drives me crazy.
I decided to put a jar in our bathroom and have been putting the pieces of the never to be used again soap into it thinking that I will find a way to use them again.
Well, it happened. I was looking it at it and thought that there had to be enough in there that I could melt it down and make bars of soap with it. And, with my husband shaking his head......again, I started the soap repurposing!
I took all of my pieces and put them into a pot and covered them with filtered water and let them sit over night.
In the morning I added a teaspoon of olive oil and began to slowly melt the mixture. It becomes soap soup. I stirred it regularly until it became all melted and bubbly. Then I put the soapy mixture into my mini bread pan tins that were sprayed with cooking spray and let them sit for about a day and a half to cool and set.
When I popped them out I had 3 new, repurposed, bars of soap!! I was thrilled. (And maybe danced around my kitchen)
I will try next time to maybe put some wax paper under them as they still did stick a little to the pan.
This has made me so happy to have been able to make those slivers useful again. And yes the jar returned to the bathroom to my husband shaking his head.
Give it a shot! Super easy and money saving.
Till Next Blog.......
Tuesday, July 28, 2015
My Own Version of Lemi-Shine
I decided to create my own Lemi-shine! I will admit have purchased the actual product in the past as it doesn't contain phosphates and says environmentally friendly, but it doesn't actually list the ingredients. That is concerning to me. Even when I went on the internet to see if they list them I still didn't find what they actually put in it. That didn't work for me! So of course I had to try making my own.
I started by purchasing food grade Citric Acid. I purchased mine from dudadiesel.com. It is Organic/Non-GMO source. I also purchased some organic orange essential oil. I decided to go with that instead of the lemon.
The basic idea to this is to add 1 teaspoon of essential oil to 1 cup of citric acid. I put mine in the food processor and let it blend together well.
Here is my tip! Let it sit for a couple minutes before you decide to open the lid of the food processor!! If you don't there will be a blast of powder come your way and its not friendly, haha.
That is it!! Really that's all there is to it.
I put mine in one of my re-purposed glass food jars with a chalkboard label marked proudly. It works amazing! My glasses are sparkly AND I know what is in it. Oh and it turns out to be much cheaper to do it my way then to purchase it.
Give it a shot.
I will admit I felt very much like a scientist using the citric acid!
Till Next Blog....................
I started by purchasing food grade Citric Acid. I purchased mine from dudadiesel.com. It is Organic/Non-GMO source. I also purchased some organic orange essential oil. I decided to go with that instead of the lemon.
The basic idea to this is to add 1 teaspoon of essential oil to 1 cup of citric acid. I put mine in the food processor and let it blend together well.
Here is my tip! Let it sit for a couple minutes before you decide to open the lid of the food processor!! If you don't there will be a blast of powder come your way and its not friendly, haha.
That is it!! Really that's all there is to it.
I put mine in one of my re-purposed glass food jars with a chalkboard label marked proudly. It works amazing! My glasses are sparkly AND I know what is in it. Oh and it turns out to be much cheaper to do it my way then to purchase it.
Give it a shot.
I will admit I felt very much like a scientist using the citric acid!
Till Next Blog....................
Sunday, January 25, 2015
My Homemade Liquid Laundry Detergent
I decided recently to try changing my laundry detergent formula. I had been making my own powder detergent but it didn't seem like it was working as well as I would like it too. So I decided to try a liquid.
I messed around with some different variations of mostly the same ingredients as the powder version and what I came up with has been amazing! And it is super cost effective as well!
I took a bar of Fels Naptha soap and grated it with a cheese grater. Put the grated soap into a pot with 4 cups of hot water and put it on medium heat on the stove. Kept stiring until the soap was completely melted. I then filled a 5 gallon bucket, from Home Depot with a lid, halfway with hot water. This I did in the tub. Then poured the melted soap into the bucket and added 1 cup of borax and 1 cup of washing soda and stirred. Then filled the bucket the rest of the way with warm water, gave it a good stir and done!
I waited until it cooled to put the lid on and had my husband carry it to the garage!
I took an empty gallon vinegar container to keep it in for the laundry room.
Now let me tell you how it cleans, it's amazing! Honestly it cleans better than anything I've ever used. Other than the Fels Naptha soap being used instead of Castile it is all the same ingredients as the powder version, minus the water, but something about it being liquid just works so much better. It even took off my husbands ring around the collar!
I thought it was cost effective making powder detergent, well it just got cheaper now that I make 5 gallons of liquid with the same items!
If you want to add an essential oil for scent you can do so before filling the bucket all the way up.
Liquid Laundry Detergent:
1 bar Fels Naptha soap
1 cup Borax
1 cup Arm and Hammer Super Washing Soda
5 gallon bucket, with lid
Essential oil if you want
It will be a little goopy so give it a good shake before using. I use about 1/4 cup per load with apple cider vinegar for fabric softener.
Give it a shot and see how great it works!
Till next blog......
I messed around with some different variations of mostly the same ingredients as the powder version and what I came up with has been amazing! And it is super cost effective as well!
I took a bar of Fels Naptha soap and grated it with a cheese grater. Put the grated soap into a pot with 4 cups of hot water and put it on medium heat on the stove. Kept stiring until the soap was completely melted. I then filled a 5 gallon bucket, from Home Depot with a lid, halfway with hot water. This I did in the tub. Then poured the melted soap into the bucket and added 1 cup of borax and 1 cup of washing soda and stirred. Then filled the bucket the rest of the way with warm water, gave it a good stir and done!
I waited until it cooled to put the lid on and had my husband carry it to the garage!
I took an empty gallon vinegar container to keep it in for the laundry room.
Now let me tell you how it cleans, it's amazing! Honestly it cleans better than anything I've ever used. Other than the Fels Naptha soap being used instead of Castile it is all the same ingredients as the powder version, minus the water, but something about it being liquid just works so much better. It even took off my husbands ring around the collar!
I thought it was cost effective making powder detergent, well it just got cheaper now that I make 5 gallons of liquid with the same items!
If you want to add an essential oil for scent you can do so before filling the bucket all the way up.
Liquid Laundry Detergent:
1 bar Fels Naptha soap
1 cup Borax
1 cup Arm and Hammer Super Washing Soda
5 gallon bucket, with lid
Essential oil if you want
It will be a little goopy so give it a good shake before using. I use about 1/4 cup per load with apple cider vinegar for fabric softener.
Give it a shot and see how great it works!
Till next blog......
Sunday, August 3, 2014
One Of My Favorite Crafty Projects!
I have talked in a previous post that I save my glass jars and lids from the products that I purchase. I have every size and shape you can think of. I use them to store things in my pantry and fridge. I do not use plastic containers in my house, not even BPA free. Besides I paid for them, it is a part of the cost of the product, so why not?
The problem is that when I put something in them at some point my husband will ask what is in it, or where something is because there isn't a label, or how long something has been in it since there isn't a date.
While I was repairing one of my daughter's chalkboards with non-toxic chalkboard paint I had an AHA moment.
I took out all of my jars and painted strips of chalkboard paint on them. I have seen it on mason jar drinking glasses in stores. Now I would be able to write what was in it and the date I put it in there and when the product is used up, tada! clean and erase it and it's ready for something else.
Jars, free-ish with purchase of product. Chaulkboard paint $2.00. Borrowed 4 year old's sponge paint brush. I LOVE them! I feel so organized.
This could be one of my favorite crafty projects ever!
Give it a shot.
Till Next Blog……..
The problem is that when I put something in them at some point my husband will ask what is in it, or where something is because there isn't a label, or how long something has been in it since there isn't a date.
While I was repairing one of my daughter's chalkboards with non-toxic chalkboard paint I had an AHA moment.
I took out all of my jars and painted strips of chalkboard paint on them. I have seen it on mason jar drinking glasses in stores. Now I would be able to write what was in it and the date I put it in there and when the product is used up, tada! clean and erase it and it's ready for something else.
Jars, free-ish with purchase of product. Chaulkboard paint $2.00. Borrowed 4 year old's sponge paint brush. I LOVE them! I feel so organized.
This could be one of my favorite crafty projects ever!
Give it a shot.
Till Next Blog……..
Friday, July 25, 2014
Awesome Non-toxic Wasp Deterrent
Recently I heard the screams of my 4 year old as she ran out of the clubhouse of her swingset. Thinking the worst as I ran to her she showed me a nasty wasp sting on her hand. Once I wiped apple cider vinegar on it and put a paste of baking soda she was better.
I went to her clubhouse to see what we were dealing with and saw that the wasps had taken up shop in both the upper and lower parts with pretty large nests. Knocking them down is a waste of time, as they showed up the next day building again. Since I don't use chemicals, and the other non-toxic spray recipes did not help, I needed a solution.
I found something in one of my organic gardening magazines and decided to give it a shot.
I laughed when they arrived. They look like giant paper mâché toys.
I hung one in the top of her clubhouse and one in the bottom. Shockingly within a few days the wasps left! The wasps are very territorial and this giant fake nest makes them abandon their nest and go.

Two fake wasp nests were only $9.95. Completely worth it. The wasps are gone and my daughter isn't afraid to play in her swingset anymore!
www.gardeners.com Gardener's Supply Company
Check it out!
Till next blog......
I went to her clubhouse to see what we were dealing with and saw that the wasps had taken up shop in both the upper and lower parts with pretty large nests. Knocking them down is a waste of time, as they showed up the next day building again. Since I don't use chemicals, and the other non-toxic spray recipes did not help, I needed a solution.
I found something in one of my organic gardening magazines and decided to give it a shot.
I laughed when they arrived. They look like giant paper mâché toys.
I hung one in the top of her clubhouse and one in the bottom. Shockingly within a few days the wasps left! The wasps are very territorial and this giant fake nest makes them abandon their nest and go.
Two fake wasp nests were only $9.95. Completely worth it. The wasps are gone and my daughter isn't afraid to play in her swingset anymore!
www.gardeners.com Gardener's Supply Company
Check it out!
Till next blog......
Sunday, March 23, 2014
BTW, We Have A Facebook Page
I'm not sure I have posted this before , but we have a Facebook page also. Doesn't everyone it seems??
https://www.facebook.com/tampagreenmommy
Till Next Blog……..
Saturday, March 8, 2014
Changed Up My Laundry Detergent, A Little!
If you have been following my blog, you know I have been making my own laundry detergent for quite some time.
I have been using the same mixture for a while now and had discovered that I was having trouble with my towels having an odor. I know some of the problem is the front load washer that I despise, but I thought if I could change up the "formula" of my soap mixture it might do some good.
I still use the Dr. Bronner's Mild Unscented Baby Soap, which I shred with a cheese grater, but I upped the amount of Arm & Hammer Super Washing Soda and Borax to 2 cups each instead of the one each I had been using. I also switched from white distilled vinegar I had been using in the softener department to apple cider vinegar. I then decided to add a couple of drops of lavender essential oil to the top of the detergent.
This combination is working incredible! All the towels now comes out clean smelling and soft again!
My New and Improved Laundry Detergent:
1 bar Dr. Bronner's Mild Unscented Baby Soap, shredded
2 cups Arm and Hammer's Super Washing Soda
2 cups Borax
5 or so drops of Lavender essential oil on top of detergent
1/2 Cup Apple Cider Vinegar for fabric softener
Of course wool dryer balls are a must!
Give the new recipe a shot!
Till Next Blog…...
I have been using the same mixture for a while now and had discovered that I was having trouble with my towels having an odor. I know some of the problem is the front load washer that I despise, but I thought if I could change up the "formula" of my soap mixture it might do some good.
I still use the Dr. Bronner's Mild Unscented Baby Soap, which I shred with a cheese grater, but I upped the amount of Arm & Hammer Super Washing Soda and Borax to 2 cups each instead of the one each I had been using. I also switched from white distilled vinegar I had been using in the softener department to apple cider vinegar. I then decided to add a couple of drops of lavender essential oil to the top of the detergent.
This combination is working incredible! All the towels now comes out clean smelling and soft again!
My New and Improved Laundry Detergent:
1 bar Dr. Bronner's Mild Unscented Baby Soap, shredded
2 cups Arm and Hammer's Super Washing Soda
2 cups Borax
5 or so drops of Lavender essential oil on top of detergent
1/2 Cup Apple Cider Vinegar for fabric softener
Of course wool dryer balls are a must!
Give the new recipe a shot!
Till Next Blog…...
Friday, November 8, 2013
YUMMY Pumpkin Ice Cream
Today my daughter and I made the yummiest Pumpkin Ice Cream! So of course I am going to share.
If you make it with fresh pumpkin, cut the pumpkin into four parts and put it on a rimmed baking sheet. Bake it at 350 until it's fork tender. Once it cools, scoop out the pumpkin away from the skin and put it into a food processor and process until smooth.
If you are going to use canned, make sure it is organic. Farmer's Market brand is BPA free.
You will need 1 Cup of Pumpkin.
In a saucepan over medium heat, whisk together 1 1/2 Cups Organic milk, 1 cup sugar, and 2 eggs. Keep stirring constantly for 10 minutes. The mixture will start to thicken, do not let it brown. Remove from heat and whisk in the pumpkin, 1 cup of heavy whipping cream, 1/4 tsp cinnamon, 1/2 tsp nutmeg. Chill the mixture in the refrigerator then churn in ice cream maker for 30 minutes until firm. Chill in freezer overnight for firmer ice-cream.
YUM! Can't wait for Thanksgiving to share this with everyone.
Give it a try.
Till Next Blog.......................
If you make it with fresh pumpkin, cut the pumpkin into four parts and put it on a rimmed baking sheet. Bake it at 350 until it's fork tender. Once it cools, scoop out the pumpkin away from the skin and put it into a food processor and process until smooth.
If you are going to use canned, make sure it is organic. Farmer's Market brand is BPA free.
You will need 1 Cup of Pumpkin.
In a saucepan over medium heat, whisk together 1 1/2 Cups Organic milk, 1 cup sugar, and 2 eggs. Keep stirring constantly for 10 minutes. The mixture will start to thicken, do not let it brown. Remove from heat and whisk in the pumpkin, 1 cup of heavy whipping cream, 1/4 tsp cinnamon, 1/2 tsp nutmeg. Chill the mixture in the refrigerator then churn in ice cream maker for 30 minutes until firm. Chill in freezer overnight for firmer ice-cream.
YUM! Can't wait for Thanksgiving to share this with everyone.
Give it a try.
Till Next Blog.......................
Saturday, October 26, 2013
One of My Favorite Things In The Garden
We made a decision that we wanted to try to plant as many bee and butterfly attracting plants as possible. They are beneficial to pollinate our garden beds so why wouldn't we. We have planted a lot of bee attracting flowers but one of my favorite things we have planted has been the Butterfly (Milkweed) Weed.
The plant itself is great. It is a green stalk with green leaves that grows straight, and they have beautiful red and yellow small flowers. I liked them when I saw them sprout up, but then came the caterpillars.
Boy did they come. They totally crushed the first set of plants on one side of the garden, literally left them looking like sticks, then the made their way to the other side of the garden for the other set of Milkweed we had planted. By the time they had taken those down to sticks the other ones had started to re-sprout. So.....they made their way back.
Then they disappear.
The plants start growing back nice and healthy and you aren't sure where the caterpillars are. Well.....maybe
We made the most amazing discovery yesterday. We found a crysilis. It was beautiful. A gorgeous green with a beautiful gold shimmery line and gold dots. It looked like there was some amazing gem inside.
Today as we had the picnic my 3 year old daughter planned we discovered that they butterfly had just hatched. It was holding onto it's crysilis, which I read they do for an hour after the hatch to allow their wings can harden so they can fly.
Then he took off.
I'm sure we will see him in the garden as we have seen many of them hanging out and drinking the nectar from the Milkweed, or chasing my 3 year old around the yard as they have been doing.
Seeing the circle of life for this creature has been fascinating.
One of my favorite things we have planted has been Butterfly (Milkweed).
Give them a shot, you will be happy with the results.
Till Next Blog......
The plant itself is great. It is a green stalk with green leaves that grows straight, and they have beautiful red and yellow small flowers. I liked them when I saw them sprout up, but then came the caterpillars.
Boy did they come. They totally crushed the first set of plants on one side of the garden, literally left them looking like sticks, then the made their way to the other side of the garden for the other set of Milkweed we had planted. By the time they had taken those down to sticks the other ones had started to re-sprout. So.....they made their way back.
Then they disappear.
The plants start growing back nice and healthy and you aren't sure where the caterpillars are. Well.....maybe
We made the most amazing discovery yesterday. We found a crysilis. It was beautiful. A gorgeous green with a beautiful gold shimmery line and gold dots. It looked like there was some amazing gem inside.
Today as we had the picnic my 3 year old daughter planned we discovered that they butterfly had just hatched. It was holding onto it's crysilis, which I read they do for an hour after the hatch to allow their wings can harden so they can fly.
Then he took off.
I'm sure we will see him in the garden as we have seen many of them hanging out and drinking the nectar from the Milkweed, or chasing my 3 year old around the yard as they have been doing.
Seeing the circle of life for this creature has been fascinating.
One of my favorite things we have planted has been Butterfly (Milkweed).
Give them a shot, you will be happy with the results.
Till Next Blog......
Saturday, October 19, 2013
Tuesday, October 8, 2013
Non-Toxic Halloween Face Paint
If your child has decided to be something for Halloween that needs face paint, I have a healthy option. Natural Face & Body Paints by Natural Earth Paint. http://www.naturalearthpaint.com/ They are non-toxic, organic, free of heavy metals, parabens, and formaldehyde. They are made using clay and natural pigments.
Have a safe and fun Halloween!
Till Next Blog...........
Have a safe and fun Halloween!
Till Next Blog...........
Sunday, August 25, 2013
Cheap Non-Plastic Popsicle Molds
I have been looking for a while to find a stainless steel popsicle mold. I found a couple, but they are very expensive. And since I do not use or trust plastic this has been my mission.
On a recent trip to Walmart, I go there and to dollar stores since they normally always have cheap non-plastic kitchen items, I discovered these small stainless steel containers that were the perfect size for a small popsicle. I always make smoothies in the morning and wanted to freeze the leftovers for popsicles. Well for $.97, yes 97 cents for 4, I was able to load up on these little cups that hold the perfect amount for a summer treat. All I had to add was a popsicle stick!
Everyone in my family loves them, and for really cheap I have found a non- toxic way to have popsicles!
Till Next Blog....
On a recent trip to Walmart, I go there and to dollar stores since they normally always have cheap non-plastic kitchen items, I discovered these small stainless steel containers that were the perfect size for a small popsicle. I always make smoothies in the morning and wanted to freeze the leftovers for popsicles. Well for $.97, yes 97 cents for 4, I was able to load up on these little cups that hold the perfect amount for a summer treat. All I had to add was a popsicle stick!
Everyone in my family loves them, and for really cheap I have found a non- toxic way to have popsicles!
Till Next Blog....
Subscribe to:
Posts (Atom)